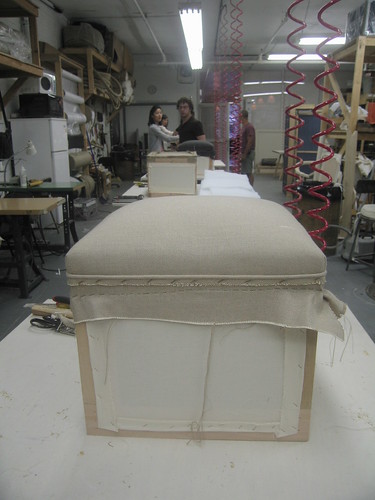
Next up, attach the fabric that will cover the sides of this ottoman. It was pre-cut for us before we arrived, so we just needed to staple it on, upside down, all around, just below that cording.
Our next task was to apply a tacking strip all around the ottoman, just below the cord, and it had to be very snug! I should say at this point that one skill I mastered in all this was staple removal! I had to make two attempts before I got the positioning of the tacking strip just right.
In the photo above you can also see the remnant of my near fatal mistake - the one where I cut the fabric in the wrong place. All these sins, hidden from view!
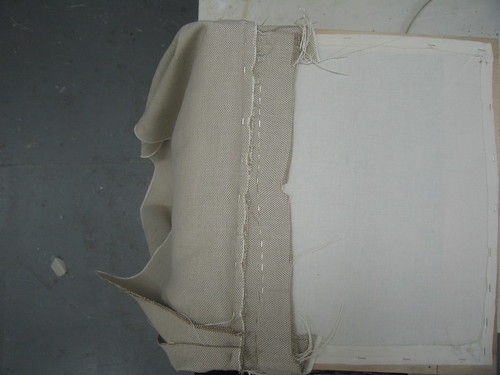
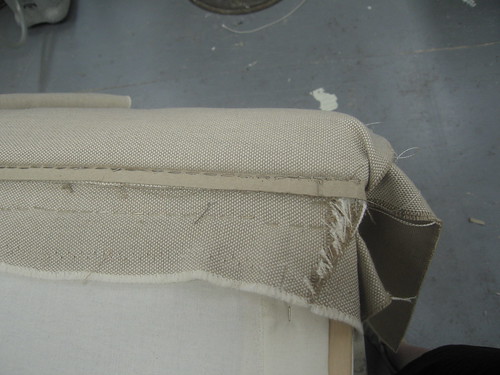
After the tacking strip, the Dacron wrap. Making sure there is 1/4" of Dacron above the tacking strip, and pulled just snug but not too tight, staple along the tacking strip - use lots of staples - one right after the other. Then tack down the Dacron on the sides.
Time to pull the fabric down, and make all the little adjustments so that the Dacron underneath is straight, and the fabric is pulled taut. Staple around the bottom of the ottoman to secure the fabric. Now, to make the bottom neat, use some cambric to cover up all the stapled fabric. You've seen cambric before on your own furniture. It's that black or brown mesh-like fabric. It simply gets folded in and stapled down, with corners neat and tidy.
The last step was a bit of hand sewing, using a really cool curved needle. The seam on the side where the fabric ends meet needed to be carefully adjusted and then using a basic stitch, the seam was made. This part might have been the easiest for me.
The finished ottoman!
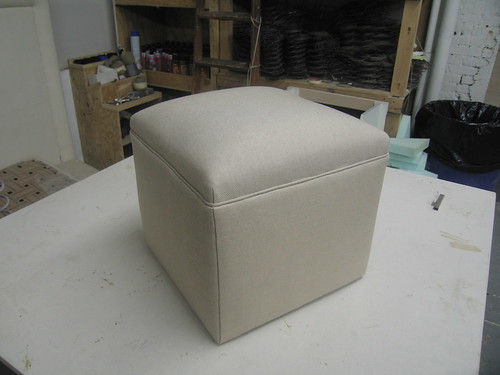
I'd give myself a B- on the overall job. Which, considering it was all so new to me, was pretty good. The instructor would probably give it a C. The ottoman is a bit uneven on the top. I can see all the spots where the fabric was not attached consistently.
I found the work to be somewhat physically demanding, which surprised me. Using the staple gun was hard on my hands. It took awhile to get comfortable using the stapler. I found myself shifting from the left hand to the right, searching for the one that felt the most at ease. There were times I was contorted in odd positions to get the stapler in position. Using it to make firm, even staples took some practice but by the last class I felt more confident in that.
My wrist got very sore the night we attached the fabric to the top. It felt like a serious carpal tunnel coming on, and it affected my ability to apply even pressure on the fabric. I broke a sweat in each session, and got home completely drained. The last night I had to haul the ottoman on the subway and walk the 5 blocks home with it, and my laptop and my change of clothes. Exhausting!
But I remain undaunted. I have a book with projects arranged from easy to challenging, and I would like to embark on some of these to see how I improve. For now I am a bit relieved the class is over. And the little ottoman is resting in the living room. It will appear in knitting photo shoots if the weather ever lightens up!

7 comments:
Lovely!
Perfect for photo shoots. You did a great job and it looks so comfortable. You've inspired me.
i think this looks fantastic. i can't see anything uneven! go you!
I think it looks fantastic. A+ from me!
Very cool!
I think it looks amazing! Thank you for the photos. It's really cool to see the inside because it's get covered.
Its your "instructor" here!
1. It's fox edge (not fox face)
2. It's 3M #74 glue (not #76)
3. This was very entertaining, LOL. See you in the advanced series ;)
Well done! I once dreamed of an Ottoman Empire! I made a leopard and pink velvet ottoman out of a sonotube, those cardboard forms for concrete. I'm with you, it is much harder than I expected.
Post a Comment